Welcome to the LnLP Forums and Resource Area

We have updated our forums to the latest version. If you had an account you should be able to log in and use it as before. If not please create an account and we look forward to having you as a member.

Snippet's From the Meuse to the Rhine

Daz

Member
Joined
Oct 22, 2014
Messages
861
Points
43
Location
England
This is instructions for my on going AAR, of the Epic "From the Meuse to the Rhine" scenario.
Its probably the largest, and most complex scenario in the Command Ops Line-up.

The effort that went into making the scenario, the research, building the map and the estabs, must have been a labour of love, and is most definitely a work of art.
I take my hat of to Richard Simovitch, the designer, and thank him for this amazing scenario.

This is my effort at making an AAR for it.
It's such a huge scenario that I decided I would just post the more important events, rather than trying to cover the whole scenario, hence my title, "Snippet's from the Meuse to the Rhine".

This pdf will bring you up to speed of where I have got to so far.

https://assets.adobe.com/link/a3d965bc-741f-4e35-9f76-0f78ac83fdc5?section=activity_public

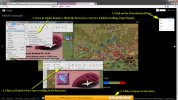
Be sure to follow the instructions in the image attached to this post, to download the pdf for a high rez view.
The view you are presented on the adobe cloud web page is just a low rez version, even if you click on the expand icon top right of the preview.
To see the high rez version it has to be downloaded to your computer, where you can open it with adobe reader.
 

Attachments

  • FtMttR-pdf-download-instructions.jpg
    FtMttR-pdf-download-instructions.jpg
    653.5 KB · Views: 73
Last edited:

john connor

Member
Joined
Oct 22, 2014
Messages
2,488
Points
63
Age
60
Location
Brussels
Beautiful graphic post, Daz. Fantastic. And the Somersets can hook up already!! Make sure to take a snap of the historic moment.
 

john connor

Member
Joined
Oct 22, 2014
Messages
2,488
Points
63
Age
60
Location
Brussels
Lovely progress, Daz. You make it all seem very easy. It's interesting. Am I the only person for whom it rankles that the AI is just sitting back and doing nothing substantive about that crucial rail bridge? (Or has done nothing, I mean, for the last 4 days - it's too late now by far....) Is Dave happy about what the AI is doing here, I wonder? Or - perhaps more pertinently - is Richard (Simovitch) happy? I make these comments because, as I've said, I've witnessed before that the AI would sit back, stand off, despite having forces enough to try something. I think in this scenario it must be intimately connected to your tactics, in not challenging the big central point-scoring objectives until (coming shortly...) XXX Corps is north of the river and can encircle them. It's a great tactic and it's tempting to think that it defeats the AI because it's not historical and Richard must have set up this scenario for a more or less historical contest over objectives, so that, for instance, if you don't go for the Arnhem highway bridge it wrong foots the AI. But that can't be the case really, because your tactics are in fact very historical, in a way. Aside from failing to uselessly sacrifice a Bn at the road bridge you have, in effect, ended up establishing a big and very successful Oosterbeek pocket, which (aside from 'big' and 'very successful' ) is exactly what they did historically. You've just done it better, as it were. The HUGE (unhistorical) difference is, of course, that you have an intact rail bridge.

And if Richard set up the points to expect a contest over Arnhem then it should be that the AI has (at least) stopped you winning already. Maybe it already has 100 points, or near enough, which will make your tactics a disaster, in points terms, but would only show that the points need tinkering with. Because if, at the end of all this, you sit in possession of Arnhem highway bridge, a decent bridgehead nth of the rhine, and Nijmegan (as I'm sure will happen) then you should get a decisive victory, and it should only be by denying you that that the Axis wins. If, on the other hand, the AI is sitting back like that and it hasn't already a hope of getting 100 points from the objectives it has chosen, then the points definitely need tinkering with, I think.

One clear way to force a more historical confrontation and push the AI to more activity would be to go into mapmaker and drop the Arnhem railbridge from the start, so that that crossing cannot be factored in. The fight would then have to be in Arnhem centre and your paras would have a real uphill struggle, perhaps. Another way would be to concentrate the vast preponderance of points, for both sides, on taking, holding, denying the 4 major crossings, so that it really was impossible for either side to win without holding these crossings. I offer these as (obvious) thoughts for the scenario and game designers who might be following your scenario and think that it looks fairly easy to defeat the AI. We know it's not easy, of course - you have put a tremendous amount of thought into it and have ordered down to company level regularly. If you fire up this scenario, and you're a beginner, and you give orders only to higher HQs, then you will - I trust (would be interesting to test it, if time allowed) lose badly.

It's a masterful show, Daz, and you've picked the exact right tactic, but have you really felt that the AI has responded appropriately to the Arnhem rail bridge threat? If it hasn't then I don't think that would be down to the engine or the AI itself, but how points are distributed across the map and time. Just thinking aloud, really. I did - as I've said - manage to beat the AI myself in this scenario, but I posted about it, because it only happened because the AI sat back, I thought.
 
Last edited:

Daz

Member
Joined
Oct 22, 2014
Messages
861
Points
43
Location
England
FtMttR-D5-0042-OverviewArnhem.jpg View attachment 208 Hope this helps explain the situation a bit mate.
Let me know if you want me to send you another save, then you can have a poke about to see what you think is going on.
I have put a red stroke around all the crosses so you can see them better. These are attempts to penetrate the perimeter.
Obviously there have been more attempts than Crosses, as not every attempt ends in complete disaster, only most lol
If the Arnhem Rail bridge was dropped from the start I would still use the same tactics.
The only difference being I would have to wait a bit for the bridge to be re-built.
The important objectives at the start of the scenario, in my opinion, at the Arnhem end, are the railway bridge, that bend in the river, the supply DZ (Para SEP), and a supply corridor.
Even if they drop the main highway bridge in Arnhem, it doesn't matter so long as I have that bridgehead around the railway bridge, so I can rebuild it un-molested if necessary.
 
Last edited:

john connor

Member
Joined
Oct 22, 2014
Messages
2,488
Points
63
Age
60
Location
Brussels
Good explanation, thanks, Daz. I suppose I might have been thinking nothing much was going on when quite a lot had been going on. It's a lovely graphic too. I guess I would think the effort should have been made at the rail bridge immediately, when I think they could have used some of the early reinforcements to take it from the sth. But you're right, that would have led to a deficit in Nijmegan, and you could have changed tactics in response (sending the 82nd over the bridge and up to Arnhem, for example, or thrusting harder from the nth bank into Arnhem). Plus, as you say, it's theoretically possible for you to rebuild the rail bridge in a shortish time (40 hours?), though your para engineers don't have bridges so you could only start that around day 5, which would make getting round into Arnhem tough, no? Maybe it wouldn't take that long to rebuild it, though. I think there are other prepped crossings you could use in addition, too, right - both west and east of the Arnhem road?

Did any of those infiltration attempts result in disrupted supply? Have you had any yellow supply messages?
 

Daz

Member
Joined
Oct 22, 2014
Messages
861
Points
43
Location
England
I think if they had spent time and resources on trying to take the rail bridge, (not an easy task against a whole reinforced Bn of elite troops with a Platoon of AT guns, supported by 75mm howitzers) 6 Green Howards might have been able to bounce the bridge in the early morning of day 4.

The river span is about 200m so about 20 hours to turn it into a light road bridge, but probably much less if I used 600 engineers to help build it, instead of just one Coy of engineers.

There are a number of ferrys, and a heavy bridge leading into the Rail Yard on the east side, that I intend to use as well.

There were a few messages yes, but there are four different routs within the supply corridor, so there is nearly always an alternative.
 
Last edited:

john connor

Member
Joined
Oct 22, 2014
Messages
2,488
Points
63
Age
60
Location
Brussels
Lovely pic, Daz. Very informative, even without having a clue what the abbreviations mean! What is PAA, LOA, BSA, FEBA, for example?
 

Daz

Member
Joined
Oct 22, 2014
Messages
861
Points
43
Location
England
I was making a key, and a write-up, but fell asleep in my chair, so posted what I had and went to bed :oops:
Won't get a chance to finish it until tonight.
They are all Operational graphics FM 1-02.
I used to know a lot of them, but its been a looong time, and they have changed somewhat since I was involved in that sort of thing.
The pdf for it can be downloaded from here, or you can wait until tonight, and I'll just do the key for the relevant stuff, rather than you having to trawl through several hundred pages looking for it.

http://armypubs.army.mil/doctrine/Active_FM.html

Anyway I thought I would read up on it, then use them in my maps. to see if I like the look of it.
What do you think?
Better than what I was doing before with my own pseudo map graphics?

I'm still making the brushes, and symbols as I go along, so it takes quite a while at the moment. Hopefully I will get faster.
 
Last edited:

john connor

Member
Joined
Oct 22, 2014
Messages
2,488
Points
63
Age
60
Location
Brussels
I think it looks great. Very professional. I'm amazed at what you can do. Is this all with photoshop? I wish there were some basic AAR making tools included in CO2, somehow. I think doing AARs is a significant way to improve gameplay and make the whole experience more interesting and fun. Wish there were more around, and I'm guessing that the graphic requirements put people off. It's extra effort.

I liked your 'pseudo map graphics' too though. They did the job perfectly well.
 

Daz

Member
Joined
Oct 22, 2014
Messages
861
Points
43
Location
England
I agree with you, the planning graphics for Command Ops 2 will transform the way people play the game I think, and make doing AAR's much easier.

I'm actually using Adobe Illustrator at the moment for the map graphics, as it needs pattern brushes, and symbols.
It's slow going because not only do I have to make my own symbols, and brushes, I also need to learn how to use Illustrator!
Planning Graphics Key.jpg
This is some of the symbols I have used so far.
Its a quick reference guide that I think is more useful than the huge pdf that is FM 1-02, as it only applies to stuff that's relevant in the game, and I have put the definition next to (or close to) the symbol, so you don't have to waste time looking for it.
 

Daz

Member
Joined
Oct 22, 2014
Messages
861
Points
43
Location
England
Thanks Rob, I'm glad you are enjoying it :)

I think this concludes all the symbols I have used so far in my AAR.
Ill update it as I introduce more.
I'm off to a Halloween party now so the write up for the last sitrep,Planning Graphics Key 2.jpg will have to wait another day I'm afraid.
 

Iconoclast

Member
Joined
Oct 26, 2014
Messages
130
Points
18
Location
germany
Daz, have you checked out a program called "MilSketch"? It is very clunky, but probably worth to have a look into.

regards,

A
 

Daz

Member
Joined
Oct 22, 2014
Messages
861
Points
43
Location
England
FtMttR D5 1148 Encircling of Arnhem.jpg Thanks for the advice mate, but I'm determined to learn how to use Illustrator, as it will give me more flexibility, I think
 
Last edited:
Top