lollipop guild
Member
So after a few games played purely to get used to the gameplay and controls etc..., I thought I'd do a very quick little AAR.
First up is the Armoured Infantry taking the Bridge just before midday on Day 1.
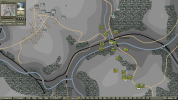
This seemed easy enough. There were no issues with stray enemy units being annoying or anything untoward happening. The Battle for Lommersweiler on the other hand was another story. A couple of enemy units decided they were going to lead my troops a right merry dance on this hill and so by early evening on Day 2 I was still attempting to figure out just what a man had to do to get them off my case. This little battle on the hill went on into Day 3 just became a royal pain in the rear to be honest. Here we see the annoying units being annoying.
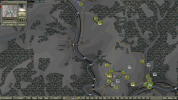
I wouldn't mind so much but I had them completely surrounded and yet they still refused to give in. Anyway I decided to leave some of my weaker units to Defend in Situ while I pushed on for Brietfeld with all the spare units I could muster. I realised at some point now that I'd left the reinforcements, quite a nice looking Cavalry Unit, way back down the bottom of the map where they'd first appeared and so endeavoured to push them up towards Brietfeld ASAP ready to join the impending battle at St. Vith.
Unfortunately, I launched into my attack on St. Vith too soon and at the same time failed to properly account for the defence of Breitfeld, and all this while failing to plan the attack properly, ...or at all. In fact I simply pushed on up into town and hoped for the best. This was just impatience perhaps, or maybe it was a little disillusionment at wasting soo much time taking and holding the hill at Lommersweiler, but whatever I was thinking I should have re-grouped back at Breitfeld and assessed and planned before pushing on.
Anyway, here's the view as I found myself bogged down in St. Vith while losing Breitfeld at the same time.
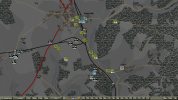
And here's more or less final position at the end of the game.
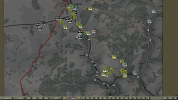
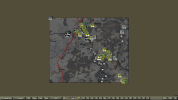
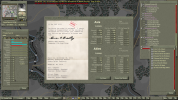
And just for those completists amongst you, the zoomed out version and the Draw notification.
A very enjoyable battle. I learned a lot from it I think, such as, don't spend so much time chasing around after a couple of weak enemy units on top of a hill, and maybe stop and re-group before charging in through the from door at St. Vith.
One last point I wanted to note, and maybe you more knowledgeable military minds amongst you can answer this point for me. I held the Bridge from very early in the game right through to near the end when all of a sudden a lone enemy unit forced it's way through 5 or 6 of my much stronger units to plonk itself directly on the Objective at which point it lost it's lovely green colour and I lost that Objective. This was both frustrating and deflating. My question is, is it realistic for a lone, weak enemy unit to simply charge through all my stronger units simply to sit on an objective like that? How does the game decide when an objective is taken or lost? Does there have to be a certain amount of friendly units within a certain distance of the actual objective marker?, and finally will a lone enemy unit within a certain distance of that marker cause me to lose it or do there have to be a few in the vicinity for that to happen? EDIT: ok, I've just found the answer in the manual. It makes a lot of sense.
Anyway, thanks for reading. I hope you liked my first AAR(brief as it was), and thanks in advance for any info.
That was a very enjoyable battle! Even with the stolen Bridge objective near the end...
First up is the Armoured Infantry taking the Bridge just before midday on Day 1.

This seemed easy enough. There were no issues with stray enemy units being annoying or anything untoward happening. The Battle for Lommersweiler on the other hand was another story. A couple of enemy units decided they were going to lead my troops a right merry dance on this hill and so by early evening on Day 2 I was still attempting to figure out just what a man had to do to get them off my case. This little battle on the hill went on into Day 3 just became a royal pain in the rear to be honest. Here we see the annoying units being annoying.

I wouldn't mind so much but I had them completely surrounded and yet they still refused to give in. Anyway I decided to leave some of my weaker units to Defend in Situ while I pushed on for Brietfeld with all the spare units I could muster. I realised at some point now that I'd left the reinforcements, quite a nice looking Cavalry Unit, way back down the bottom of the map where they'd first appeared and so endeavoured to push them up towards Brietfeld ASAP ready to join the impending battle at St. Vith.
Unfortunately, I launched into my attack on St. Vith too soon and at the same time failed to properly account for the defence of Breitfeld, and all this while failing to plan the attack properly, ...or at all. In fact I simply pushed on up into town and hoped for the best. This was just impatience perhaps, or maybe it was a little disillusionment at wasting soo much time taking and holding the hill at Lommersweiler, but whatever I was thinking I should have re-grouped back at Breitfeld and assessed and planned before pushing on.
Anyway, here's the view as I found myself bogged down in St. Vith while losing Breitfeld at the same time.

And here's more or less final position at the end of the game.

And just for those completists amongst you, the zoomed out version and the Draw notification.


A very enjoyable battle. I learned a lot from it I think, such as, don't spend so much time chasing around after a couple of weak enemy units on top of a hill, and maybe stop and re-group before charging in through the from door at St. Vith.
One last point I wanted to note, and maybe you more knowledgeable military minds amongst you can answer this point for me. I held the Bridge from very early in the game right through to near the end when all of a sudden a lone enemy unit forced it's way through 5 or 6 of my much stronger units to plonk itself directly on the Objective at which point it lost it's lovely green colour and I lost that Objective. This was both frustrating and deflating. My question is, is it realistic for a lone, weak enemy unit to simply charge through all my stronger units simply to sit on an objective like that? How does the game decide when an objective is taken or lost? Does there have to be a certain amount of friendly units within a certain distance of the actual objective marker?, and finally will a lone enemy unit within a certain distance of that marker cause me to lose it or do there have to be a few in the vicinity for that to happen? EDIT: ok, I've just found the answer in the manual. It makes a lot of sense.
Anyway, thanks for reading. I hope you liked my first AAR(brief as it was), and thanks in advance for any info.
That was a very enjoyable battle! Even with the stolen Bridge objective near the end...
Last edited: