- Joined
- Oct 14, 2014
- Messages
- 2,108
- Points
- 113
- Age
- 59
- Location
- Pueblo West, Colorado
- Website
- lnlpublishing.com
Heroes of the Pacific Battle Generator is a new product coming from Lock 'n Load Publishing. That will be released later on this month. We want to put the power to create scenarios and engagements into your hands. Allowing you to get the most out of your gaming. The Battle Generator will be available as a free download in our Resource section and will also be a paid product for those who wish to have a printed edition.
Once again Ralph Ferrari takes to the jungles of the Pacific to bring you another First Look and After Action Report. Currently a 250 point battle is considered a small battle for the generator. We felt that a 250 point battle was more in line with a medium sized Lock'n Load scenario, so we tested out a small battle using only 125 points.
The Battle was chosen to be small. We first roll to see if it will be an Attacker vs Defender scenario, or a meeting engagement. We rolled for a Meeting Engagement. A small battle consists of only 1 map, and with the Meeting Engagement, results in three (3) Target Areas to battle over (One hex is predetermined based upon each board, the remaining Target areas are determined by rolling 1d6 and consulting the map within the Battle Generator document. These rolls come later.). Number of turns for a small battle is four (4) + result from a 1d6. We roll a one (1), so there will be five (5) turns. Next we roll for the map to be used, and we get to use Map 30. We then roll to determine orientation of the map, and we end up getting row eight (8) being north. The Japanese roll and get to setup within the north two hexrows, and the US gets the southern two hexrows. Each side gets their full order of battle since it is a Meeting engagement and a small battle (Some scenarios have a portion of each sides forces enter as reinforcements, and turn of entry determined by a die roll.). The Victory conditions for the scenario is to control more of the Target Hexes than you opponent by the end of the scenario. Hex H5 is the predetermined Target hex, and we roll to have hexes C3 and G5 as the other two (2) Target hexes.
The Japanese player chooses the following forces, and spends his entire allotment of 125 points:
Col Ichiro
Sgt Hiro
1-5-4-5 X 6
Type 97 AFV
Type 97 ATR
Type 11 SW MG
The US player chooses the following forces, and Lao spends his entire allotment of 125 points:
Lt Tall
Cpl Migliore
1-6-4-5 X 4
M10 AFV
BAR SW MG
Bazooka
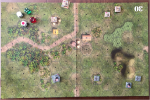
Roll for initiative results in the US player getting the initiative on Turn 1. The scenario setup can be seen in the following picture.
Turn 1 has forces of both sides advancing on the Target Hexes, and trying to gain the upper hand to keep control of them. The US player captures hexes H5 and C3, while the Japanese capture hex G5. A picture of the situation at the end of Turn 1 follows.

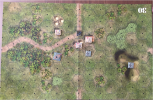
Turn 2 has the Japanese player with the initiative, and he uses it to have his Type 97 AFV in hex H6 Fire into the adjacent Target Hex of H5 to shake both Tall and the 1-6-4 with a Bazooka. The Japanese 1-5-4 in H6 then moves into hex H5 to eliminate both Tall and the shaken 1-6-4, and gain control of the Target hex. Both sides maneuver and fire trying to position themselves to capture the Target Hexes. The area around C3 has been cleared of Japanese forces, with a lone US 1-6-4 and BAR remaining. The following picture shows the battle area at the end of Turn 2.
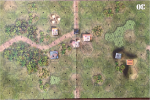
Turn 3 has the US player with the initiative. The US Player is in a very tough position. They needed to get the Japanese AFV out of play last turn to use the M10 to try and dig out the Japanese units in one of the two Target Hexes in the middle of the map. Since the Japanese forces do not shake, the shake and take mechanic is not an option, making it tough for the US forces. The US player needs to be very careful with his remaining forces and will need infantry units to gain control of the Target Hexes. He needs the firepower of the M10 to reduce the remaining Japanese units. The US player is aggressive and has the 1-6-4 in G4 enter into a melee with a 1-5-4 in H5. Both sides roll good, and eliminate each other. A Japanese 1-3-4 in G5 moves into H5 to hold down the Target Hex. The M10 targets hex J6 making a spotting attempt and getting a 1d6 of 1, success. The M10 fires and is able to reduce the 1-5-4 with Type 97 ATR to a 1-2-4, with Hiro coming away okay. The US 1-6-4 with BAR low crawls to E5 and is able to pass a Damage Check from fire coming from the 1-3-4 with Type 11 in hex G5. The situation at the end of Turn 3 can be seen in the following picture.
The US player again has the initiative for Turn 4. We are down to a handful of units remaining. The M10 uses assault move from J4 to I3 and gets Op Fire from Hiro and the 1-2-4 with Type 97 ATR to get a hull hit, but the M10 passes the Morale check. The M10 continues to H4 and gets Op Fire from the 1-3-4 with the captured Bazooka in H5. It scores a hit, but the M10 just passes the Morale Checks. The M10 then fires into hex H5 and is able to eliminate the 1-3-4 with a one-two punch from its Machine Gun and Main Gun. The lone US MMC needed to capture one of the two Target Hexes moves from D4 to E5 and receives Op Fire from the 1-3-4 with Type 11 in G5 for no effect. End of Turn 4 can be seen in the following picture.
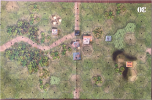
Turn 5 has the US with the initiative again, and down to a long shot. The M10 fires into Hex G5 and is able to reduce the 1-3-4 to a 1-2-4. Hiro with the 1-2-4 and type 97 ATR moves to H5. The last hurrah for the US player has the 1-6-4 with BAR move from E5 to F6 and get Op Fire from the 1-2-4 with Type 11 in G5, and is able to pass the resulting Damage check + 2. It then moves into melee with the 1-2-4 with Type 11 in G5. Both sides have a 1 to 1 odds. The US player needs to eliminate the Japanese 1-2-4, and survive the ensuing melee. The US player rolls a 4,2 to miss the KIA, the Japanese player rolls a 5,4 to eliminate the US 1-6-4. The Japanese player wins with control of two (2) of the three (3) Targets hexes (G5 and H5 vs C3 for the US player).
The scenario played out well, but we felt it was too small with only 125 points for each side. Maybe 175 or 200 will be better. On another note if you own Heroes of the Nam you can use those maps as well to create scenarios.
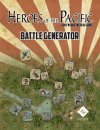
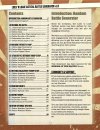
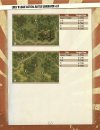
Once again Ralph Ferrari takes to the jungles of the Pacific to bring you another First Look and After Action Report. Currently a 250 point battle is considered a small battle for the generator. We felt that a 250 point battle was more in line with a medium sized Lock'n Load scenario, so we tested out a small battle using only 125 points.
The Battle was chosen to be small. We first roll to see if it will be an Attacker vs Defender scenario, or a meeting engagement. We rolled for a Meeting Engagement. A small battle consists of only 1 map, and with the Meeting Engagement, results in three (3) Target Areas to battle over (One hex is predetermined based upon each board, the remaining Target areas are determined by rolling 1d6 and consulting the map within the Battle Generator document. These rolls come later.). Number of turns for a small battle is four (4) + result from a 1d6. We roll a one (1), so there will be five (5) turns. Next we roll for the map to be used, and we get to use Map 30. We then roll to determine orientation of the map, and we end up getting row eight (8) being north. The Japanese roll and get to setup within the north two hexrows, and the US gets the southern two hexrows. Each side gets their full order of battle since it is a Meeting engagement and a small battle (Some scenarios have a portion of each sides forces enter as reinforcements, and turn of entry determined by a die roll.). The Victory conditions for the scenario is to control more of the Target Hexes than you opponent by the end of the scenario. Hex H5 is the predetermined Target hex, and we roll to have hexes C3 and G5 as the other two (2) Target hexes.
The Japanese player chooses the following forces, and spends his entire allotment of 125 points:
Col Ichiro
Sgt Hiro
1-5-4-5 X 6
Type 97 AFV
Type 97 ATR
Type 11 SW MG
The US player chooses the following forces, and Lao spends his entire allotment of 125 points:
Lt Tall
Cpl Migliore
1-6-4-5 X 4
M10 AFV
BAR SW MG
Bazooka
Roll for initiative results in the US player getting the initiative on Turn 1. The scenario setup can be seen in the following picture.

Turn 1 has forces of both sides advancing on the Target Hexes, and trying to gain the upper hand to keep control of them. The US player captures hexes H5 and C3, while the Japanese capture hex G5. A picture of the situation at the end of Turn 1 follows.

Turn 2 has the Japanese player with the initiative, and he uses it to have his Type 97 AFV in hex H6 Fire into the adjacent Target Hex of H5 to shake both Tall and the 1-6-4 with a Bazooka. The Japanese 1-5-4 in H6 then moves into hex H5 to eliminate both Tall and the shaken 1-6-4, and gain control of the Target hex. Both sides maneuver and fire trying to position themselves to capture the Target Hexes. The area around C3 has been cleared of Japanese forces, with a lone US 1-6-4 and BAR remaining. The following picture shows the battle area at the end of Turn 2.

Turn 3 has the US player with the initiative. The US Player is in a very tough position. They needed to get the Japanese AFV out of play last turn to use the M10 to try and dig out the Japanese units in one of the two Target Hexes in the middle of the map. Since the Japanese forces do not shake, the shake and take mechanic is not an option, making it tough for the US forces. The US player needs to be very careful with his remaining forces and will need infantry units to gain control of the Target Hexes. He needs the firepower of the M10 to reduce the remaining Japanese units. The US player is aggressive and has the 1-6-4 in G4 enter into a melee with a 1-5-4 in H5. Both sides roll good, and eliminate each other. A Japanese 1-3-4 in G5 moves into H5 to hold down the Target Hex. The M10 targets hex J6 making a spotting attempt and getting a 1d6 of 1, success. The M10 fires and is able to reduce the 1-5-4 with Type 97 ATR to a 1-2-4, with Hiro coming away okay. The US 1-6-4 with BAR low crawls to E5 and is able to pass a Damage Check from fire coming from the 1-3-4 with Type 11 in hex G5. The situation at the end of Turn 3 can be seen in the following picture.

The US player again has the initiative for Turn 4. We are down to a handful of units remaining. The M10 uses assault move from J4 to I3 and gets Op Fire from Hiro and the 1-2-4 with Type 97 ATR to get a hull hit, but the M10 passes the Morale check. The M10 continues to H4 and gets Op Fire from the 1-3-4 with the captured Bazooka in H5. It scores a hit, but the M10 just passes the Morale Checks. The M10 then fires into hex H5 and is able to eliminate the 1-3-4 with a one-two punch from its Machine Gun and Main Gun. The lone US MMC needed to capture one of the two Target Hexes moves from D4 to E5 and receives Op Fire from the 1-3-4 with Type 11 in G5 for no effect. End of Turn 4 can be seen in the following picture.

Turn 5 has the US with the initiative again, and down to a long shot. The M10 fires into Hex G5 and is able to reduce the 1-3-4 to a 1-2-4. Hiro with the 1-2-4 and type 97 ATR moves to H5. The last hurrah for the US player has the 1-6-4 with BAR move from E5 to F6 and get Op Fire from the 1-2-4 with Type 11 in G5, and is able to pass the resulting Damage check + 2. It then moves into melee with the 1-2-4 with Type 11 in G5. Both sides have a 1 to 1 odds. The US player needs to eliminate the Japanese 1-2-4, and survive the ensuing melee. The US player rolls a 4,2 to miss the KIA, the Japanese player rolls a 5,4 to eliminate the US 1-6-4. The Japanese player wins with control of two (2) of the three (3) Targets hexes (G5 and H5 vs C3 for the US player).
The scenario played out well, but we felt it was too small with only 125 points for each side. Maybe 175 or 200 will be better. On another note if you own Heroes of the Nam you can use those maps as well to create scenarios.


Attachments
Last edited:
