Welcome to the LnLP Forums and Resource Area

We have updated our forums to the latest version. If you had an account you should be able to log in and use it as before. If not please create an account and we look forward to having you as a member.

Quick AAR - Race for Bastogne (Allies)

Rob

Member
Joined
Oct 22, 2014
Messages
155
Points
18
Location
Vancouver BC, Canada
Hi,
Nice AAR as always! An enjoyable & illustrative read:)
I see in your repositioning you're using Move orders and road column where not in enemy contact. When in enemy contact and using Move orders to pull back what formation are you specifying? And are you getting shots up the kilt when the units present their vulnerable rear aspects/footprints to comply with the Move order?

Rob.
 

john connor

Member
Joined
Oct 22, 2014
Messages
2,488
Points
63
Age
60
Location
Brussels
Thanks Rob. Feedback much appreciated. I'm just using Move, yes. Suggestions welcome. I don't specify the formation and have usually just ticked fastest and quickest (and I guess, using Move, they would mostly then try to use Road column). I have some confusion about formations and when they are used. I was under the impression that for Attacks, at least, giving a formation specification to anything lower than a regiment had no effect at all. Is it not the same for Move? In fact, for Move I was under the impression that they always used road formation for the moving part of the order and would only adopt the specified formation at the end of the hike, when they go into defend mode. I should read the manual more, no doubt!

I use Move instead of Withdraw because I don't want them leaving any troops behind (even as an abstraction). I just want them to disengage as fast as possible and get out of there. The reason - so far throughout this scenario, in fact - is that they are not really substantially engaged with any enemy troops yet. What's happening is that they are being repeatedly devastated by enemy artillery before they get the chance to fire a shot in anger. Under the circumstances I don't even want to leave the tiny units or single companies there, to try to hold, either, because I've re-set this so many times when messing with the delay order now that I know exactly what happens to them - they get wrecked by arty, retreat, get hit again, rout, get hit again, disband. So it seems like a waste of men to leave a coy behind, but on the other hand, what can I do? I don't want the Axis armour to have a clear run through to my next positions before I've got there (another reason for just wanting them to move there as fast as possible) and it does seem that even having to pause and bombard causes the enemy some considerable delay.

I would certainly need advice, however, if any is out there, on the best orders combinations to get units out from under an arty barrage....

What were you thinking, Rob, that I should use which type of formation to best protect them (assuming the formations work)?
 

john connor

Member
Joined
Oct 22, 2014
Messages
2,488
Points
63
Age
60
Location
Brussels
Actually, I just checked what orders I gave the retreating units and it looks like this was the norm. Low aggro, low losses, high ROF, fastest avoidance route, usually bypass ticked too. To be honest though, in the situation they're in nothing seems to make much difference. As I said, they're not confronting troops much at the moment, just being hit by high explosive.
7.png 7.png
 

john connor

Member
Joined
Oct 22, 2014
Messages
2,488
Points
63
Age
60
Location
Brussels
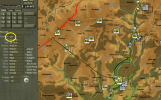
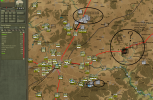
And further to that. I gave a Move order to the Bn here and did not specify a formation. The AI seems to have selected 'Line' for this coy.
8.png
 

Rob

Member
Joined
Oct 22, 2014
Messages
155
Points
18
Location
Vancouver BC, Canada
And further to that. I gave a Move order to the Bn here and did not specify a formation. The AI seems to have selected 'Line' for this coy.
View attachment 219
Hi,

As far as I know, you can specify formation/facing all the way down to and including individual units. What you cannot specify at the individual unit level is frontage. Whatever frontage you specify may/will be overridden by the unit commander.
As for pulling out in road column under heavy bombardment I'd suggest trying Move in successive lines with a fairly large dispersal (frontage) when multiple units are receiving the same order such as an entire battalion. Safest, bypass, min aggro and fastest are probably the best bet for settings. It will take longer to cover distance but will reduce the effects of bombardments. You can always re-specify the formation as the units get further away from the front when road column may be more appropriate as the enemy's ability to spot you declines. If the units are in serious contact with the enemy at the time you issue the move order try the same orders/settings as above but manually set the facing towards the enemy. This will again slow the move but should minimize the chance of taking damaging fire "up the kilt" from enemy units getting bonus fire results when the units would otherwise be presenting the vulnerable rear aspect of their footprint.
At the individual unit level of command I would still avoid road column as a formation until I'm further away from the front.
Best of luck!

Rob.
 

john connor

Member
Joined
Oct 22, 2014
Messages
2,488
Points
63
Age
60
Location
Brussels
Thanks Rob. I'll experiment with those settings and let you know. Successive lines, wide front, face enemy. Got it.
 

john connor

Member
Joined
Oct 22, 2014
Messages
2,488
Points
63
Age
60
Location
Brussels
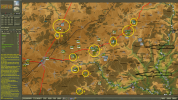
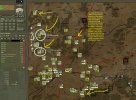
This is Day 3 morning now. It's looking suspiciously like the smaller 'roadblocks' scenario! I have received reinforcements consisting of 3 task forces, mixed mech, armour and infantry. Not huge forces, by any means. I've tried to place the greatest concentration at the point I think they will hit hardest - because Axis armoured units broke through earliest south of Drauffelt I think they will be aiming for Longvilly. Incredibly, in the darkness and confusion the enemy has already infiltrated behind my lines and got into Noville. The Engineers and concentrated arty will have to now try to block that route. I hope, as the day progresses, I don't start seeing huge concentrations of armour slipping round the back into Bastogne already! It's a worry. I'm hoping it's just a recon vanguard.

Meanwhile, we try to hold in these new positions for 12 hours. Those remnants of 110 IR up in positions 1 and 2 are very battered and exhausted. they will have to be pulled back sooner if I'm not to lose them.

9.png 9.png
 

Daz

Member
Joined
Oct 22, 2014
Messages
861
Points
43
Location
England
Nice update mate.
It's good to see your starting to slow them down now, and have consolidated them objectives on the main highway.

There are a huge amount of points in destroying the enemy.
Do you think you will be able to pocket any of them up, to help with the body count?

If they have over extended, and looking at the speed they have advanced that's entirely possible, maybe you can trap the lead elements and destroy them?
 

john connor

Member
Joined
Oct 22, 2014
Messages
2,488
Points
63
Age
60
Location
Brussels
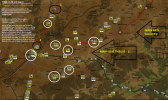
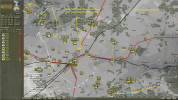
Roughly 24 hours later. The dispositions taking shape are the result of me guessing - I think incorrectly - that the Axis would try to come in force through Noville and either exit from the western edge or get into Bastogne round the back. So I have moved substantial numbers of the newly arrived PIRs up there. I feel the south eastern approaches are weak, and - more than that - I am now thinking that the Axis will in fact attack tomorrow straight down the big red road, towards Magaret.

What should I do? I have no force positioned as a reserve. I think I will await developments and treat the 501st PIR (presently guarding the western edges of the battlefield and known Axis exit points there) as a kind of reserve, if necessary.

There is an Axis force at Noville now and if I am able to gather enough spare men I would like to try and surround it, or at least mount a large supported attack from two directions. But whether I have spare will depend on what the AI does to the east.

I calculate I will end with around 65 points at present. That will probably get me a draw. If they're not in Bastogne I'll be happy though, even if it's a marginal loss. I feel that the crucial stages of this battle are now over, as far as that goes, and, as always when I get that feeling, I lose some interest in playing on and tend to play a bit quicker and sloppier. I was playing for a Draw, really - no more, knowing all I knew of how powerful the Axis force was - playing to hold Bastogne, as happened historically. I would think that will be possible now. It's played out very historically, in fact. (Note that Easy company of the 506 are actually defending in the Bois Jacques!!)

Interestingly, I think the difficult and challenging parts of this scenario all take place before you even get near the fight for Bastogne, with the shepherding of forces out east, the desperate fight to save and place the remnants of the lone 110th Inf reg.

11.png 11.png
 

john connor

Member
Joined
Oct 22, 2014
Messages
2,488
Points
63
Age
60
Location
Brussels
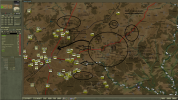
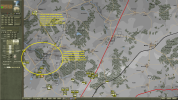
As expected from nearly three days ago (in game time) I get a draw in the end. I had the impression the AI wasn't doing much, but that proved wrong during the last 24 hours, when there was a determined effort to break through at the western edge. This was balanced by the attack at the south east, and the threat of attacks elsewhere, so that it was very difficult to know where to send forces from, to hold the major attacks at bay. There were numerous break-throughs but nothing major. I don't think the Axis was ever within sight of a victory. But nor was I. I wouldn't know how to get enough forces to marshal an effort to kill Axis forces - as suggested by Daz, for example - to garner the points available for that. I was pressed to the limit the whole time, with no reserves. Ever.

At the same time, as I mentioned before, I think the entire scenario was at least lost, for the Axis, during the first 2 days and the efforts to get the 110 infantry regiment to hold the line.

A big scenario. I'll try something smaller next. There were many, many small engagements during this scenario that were crucial and heroic, but I didn't have time to concentrate on them and post about them. Maybe I can go into more detail if I AAR a smaller, tighter scenario next time.

16.png 16.png
 
  • Like
Reactions: Daz

Rob

Member
Joined
Oct 22, 2014
Messages
155
Points
18
Location
Vancouver BC, Canada
Hi,

Thanks for this AAR!
I'm already looking forward to the next.......:)

BTW/ Did my suggested settings help at all?

Rob.
 

Daz

Member
Joined
Oct 22, 2014
Messages
861
Points
43
Location
England
Well done mate!
Not one I would have chosen to do an AAR on.
I don't like being on the defensive, it makes you feel so helpless, and to be honest I suck at it as well.

I see you made a hell of a stand at Longvilly!
Looks like you lost a lot of good men there. TF Booth and CCR 9 ARM wasn't it?
Shame we can't see how many they managed to exit. Would be nice to have a breakdown of the opposing sides points distribution.
 

john connor

Member
Joined
Oct 22, 2014
Messages
2,488
Points
63
Age
60
Location
Brussels
Thanks Rob. I did use your suggestions afterwards, but it's hard to be sure whether they made a difference. The 3 Engineer units at the bottom edge of the map, for example - they just got stuck there for 5 whole days - nothing could get theme out. But it may have eased some others. I'll continue to use and check in more detail with a smaller scenario, I think, where I can be more motivated to check detail.

Thanks Daz. The stand at Longvilly didn't last long, in fact. In fact, throughout it seemed like if I didn't follow your advice and 'keep mobile' then units were decimated by arty, which is what happened to most of those who died in the centre, just above Longvilly. Keeping mobile seemed to mean just that - I would spend (usually) the night exhausting further exhausted troops to get them into the next blocking positions, and by 9am of the following day I was pulling them back again. They would get mired with contact and arty during the day, move a little, then get moved on again by night....and so on.....
The AI might have been a bit slow to exploit this situation, I think, a bit cautious.

But for me - believe it or not - this was a victory. I myself can't see how you could be expected to get much better than a draw when the circumstances are as they are - with massive Axis superiority. And you can make many, many mistakes during the first two days which would get you worse than a draw (not covering the points where your reinforcements would arrive, for example, so that when they arrive they're already swamped and useless...) - I know because this scenario was re-stated twice, for various reasons, from saves, and I made those mistakes first time through.

In the end, the objective allocation shackles the AI, which could easily win if it was free to go straight for Bastogne and the exit objectives. But they don't appear until day 3 as objectives for the Axis (or Allies), forcing a more historical game. When you play as Axis and ignore the early objectives it is very easy to get a dec vic by going straight through the crust of the 110th IR and straight into Bastogne. So I think it's well-designed. The map is beautiful, and the OOB/estabs etc.
 
Top