- Joined
- Oct 14, 2014
- Messages
- 2,099
- Points
- 113
- Age
- 59
- Location
- Pueblo West, Colorado
- Website
- lnlpublishing.com
Heroes of the Pacific - Raid On Taivu
by Mark Selleck
So my first scenario with HotP so what better place to start than the first scenario in the book. This a pretty straight forward one with just infantry though some arty and air support though a good one to get back into the swing of things.
This one is about a raiding mission that the Marines conducted during the Guadalcanal campaign to collect Japanese supplies and intel.
So for victory the Marines need to have occupied all the building hexes on all maps before the end of turn 10, the Japanese need to hold them off to gain victory.
I set up the Japanese forward to engage the Marines from the start and try and delay them a bit, falling back and making new defensive positions along the way only after after absorbing some losses. Nothing too aggressive just trying to delay.
The Marines I have set up with a small group at the north and a larger group down south to try and advance either side of the water feature. Hopefully this will allow them to converge on the far village from both sides. Though I am a little worried about the northern group don't know if they are strong enough. Plan is to fire and advance, set up the heavy MG's inflict losses then pack up and move forward and do it again.
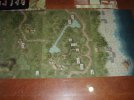
Turn 1:
The Marine raiding party land on the beach at Taivu without encountering any enemy as yet. Colonel Wiseman takes a force to try and move around the lower part of the lagoon while Lieutenant Leckie takes a platoon to head towards the top with the idea of closing on the far village from both sides.
The two Marine forces move off the beach into the jungle and almost immediately encounter small arms fire. The far left flank carrying the support MG starts to take casualties, completely unprepared for the engagement. The Japanese squad causing havoc on the US left expose themselves and start to take fire from Col Wisemans men assaulting up the beach, some of the Japanese fall cutting short the murderous fire they were laying down.
Lt Leckies men also take small arms fire and some mortar shells fired from behind the lagoon cause one of his squads to panic and find cover immediately.
The Japanese are encouraged by the surprise they were able to bring to the Marines and hope to keep them on the back foot.
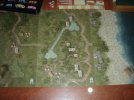
Turn 2:
The Japanese take the initiative after a strong first encounter with the Marines. The Corpsman manages to get enough men back into action to be able to man the MG on the Marines left flank. On the far right Lt Leckie is going to have to try and get to his shaken men. The Marines now deploy all their support MG’s to give some pay back.
The Japanese decide to pull back their squad who had taken casualties a bit deeper inland to start setting up a new defensive line. Col Wiseman spots a Japanese squad wielding a light MG and has one of his Squad open up manning the M2 who pours devastating fire into the position eliminating all resistance from the position.
Col Ichiro seeing some of his men wiped out decides to take some of his weaker forces back towards the small village to force the Marines to make their way through the jungle.
Further North Lt Leckie links up with some of his shaken men in attempt to get them back into action while the support squad tries to locate where the mortar fire had originated from. They believe they see some movement and let their MG and small arm rip though it is ineffective and just causes the Japanese to lob some mortars their way that land harmlessly around them. Some Marines position themselves further forward while the Japanese open up with an MG on where the mortar attack when in but the rounds fly over head.
Meanwhile in the South some Marines notice some Japanese still occupy forward positions and target them but fail to dislodge them.
The Marines seemed to have recovered a little and the Japanese are falling back for a better defensive position.
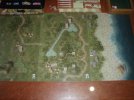
Turn 3:
The Marines regain the initiative, Lt Leckie is able to rally his men while one of the MGs in the south is packed up and ready to move.
Lt Leckie: McKean this is Marine two, come in Mckean. Requesting fire support at Love five.
Mckean fire control: Marine two this is Mckean targeting location love five…….
Lt Leckie: McKean round is on target, fire for effect, I say again fire for effect.
The Japanese hear some loud thunder originating out at sea then the distinct sound of shells making their way toward the earth. The squads at the north of the lagoon relize they are the targets of the attack and are caught somewhat of guard. The shells rain down all around while the men seek cover, after the chaos clears the men re-emerge but notice some of their comrades lying lifeless, cut down by the fire.
Down in the south the Japanese keep falling back to the small village while the some of the Marines move forward trying to flush out anyone still positioned forward. Some small arm fire is taken but doesn’t slow them as they advance. The squad manning the M2 locate the Japanese fire and open up cutting down some of them in the process.
To the North the Marines try to locate the Japanese and lay some more fire on them from their MG’s but the Japanese appear to have gone to ground after the barrage and the incoming MG fire is ineffective. Thought after the Marine fire wears off the Japanese open up causing the squads positioned forward to shake.
The Marines decide to call in some of the big guns paying off somewhat in the north, though the Japanese are still blocking the path of advance and able to shake 2 of the squads. In the south the Marines have started their advance.
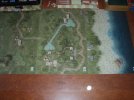
Turn 4:
The Japanese take the initiative encouraged by their successful counter attack. The Marines in the south pack up their support weapons to make ready for an advance.
The Japanese seeing a group of Marines breathing down their necks throw everything they have at them before they can get to grips with them. Some of the Marines don’t take well to the fire but some are not affected. So the Marines respond in kind with their blood up they completely wipe out the Japanese.
The Japanese now finishing occupying the first village, while Col Wisemans Marines make their way towards the defenders.
The Japanese to the north hold off wanting to see what the Marines will do, they know they should start falling back since they have taken casualties but the shaken Marines are just too tempting. Lt Leckie low crawls so as to help his men later on.
Col Wiseman notices some movement to his rear, his alarm quickly disappears as he notices it’s a fresh group on Marines under the command of Sgt Stryker coming up the beach. The South is not looking good for the Japanese, Col Ichiro is now reconsidering putting up a defence in the forward village.
The Japanese take a gamble in the North and try to pin point the Marines taking cover, excitement grips them as someone discovers some movement and the mortars open up as well as some small arms not long after. The Marines have been relentlessly pounded and now start to take casualties. The MG crew notice the mortars popping up and target them though the Japanese completely ignore the incoming fire.
The south is looking overwhelming in strength though the Japanese are causing lots of problems in the north for Lt Leckie.
Turn 5:
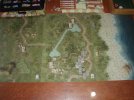
The Japanese hold the initiative for now. Col Wiseman and Lt Leckie rally most of their men though a few are still in bad shape.
The Japanese with the mortar try their luck again and are able to locate the shaken Marines again and are relentless, throwing everything they have at them. Lt Leckie is forced to hit the deck while one of his squads is completely wiped out. The Marines respond with the MG near by cutting down some of the Japanese. The other Japanese squad decides its time to start falling back to the village now, while the BAR wielding men try to get some pay back for their fallen, with little effect.
Col Wiseman and his men assault up the trail towards the small village in the south with the rest of the force behind them. The Japanese sit by waiting to see if there is a good time to pounce, though those assaulting Marines make things tricky.
Some of the Japanese make their way back to the village, as dose Col Ichiro and his men after contemplating launching a Banzai which would not have achieved much at this point in time.
So half way through, the Japanese are starting to melt away to put up their last line of defence, though they have caused all sorts of issue in the north.
Turn 6:
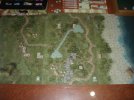
The Marines have them on the run and take the initiative with everyone rallied and ready to go.
Down in the south the Marines advance up into the village since the Japanese have abandoned it. Sgt Stryker moves off to lead some Marines up to the river to try and create a fire position on the other side. Col Wisemans men take some MG fire from the village but the Japanese haven’t seemed to have sighted the MG properly yet.
Up north the Japanese armed with the mortar haven’t lost sight of the Marines and continue their fire, though this time Lt Leckie’s leadership pays off. The Marines then return fire finally silencing the mortars.
So the Marines have now captured everything of interest from the first village. The Japanese have now just about set up their new defensive position and Lt Leckie’s Marines have finally freed up the Norther approach.
Turn 7:
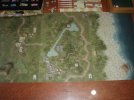
The Japanese feeling more secure in their new position take the initiative and the Marines in the north dismantle their weapons to ready for the advance.
The Japanese stragglers make their way into their defensive positions as Lt Leckie and his men start advancing. The Marines wade through the river and are forced to hit the ground as they emerge from the other side due to the heavy fire from the Japanese Type 92. Col Wiseman directs his men to fire on the MG position but fails to silence it.
More of the Marines now move out of the village, CRACK! CRACK! A yell goes up SNIPER FRONT! A sniper emerges on the hill shaking a few Marines.
The Wildcat that was circling above spots some targets and comes in for a run the Japanese manning the MG noticed the wildcat going into a dive and take cover only suffering light casualties, though the rest of the squads in the village and jungle fail to notice until too late. A squad is completely cut down and another takes heavy casualties while Col Ichiro is wounded in the attack.
The rest of the Marines now move to take up firing positions.
Now the Marines are in better positions and the Japanese were severely weakened by the Wildcat, though the Marines still have some work to do.
Turn 8:
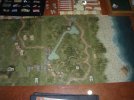
The Marines regain the initiative, rally most of their men and deploy weapons ready to pour some lead.
Sgt Stryker realizing the threat of the Japanese heavy MG directs some heavy fire from his platoon and M2 into the building cutting down all the occupants. Immediately Col Ichrio orders some men to re-man the weapon, who take some fire from another MG but just manage to come through unharmed.
Col Ichrio repositions himself at the northern part of the village just as the Lt Leckie and his men move up to flank the village. Col Wiseman gets his men to pour it on the manned MG with another group of Marines once again putting the MG out of action.
The Japanese sniper now fires at a group of Marines revealing their position from all their muzzle flashes inflicting some casualties. The Japanese at the north of the village also return fire at the Marines but fail to add to the carnage.
The Japanese are in a bit of trouble now, they need to try and hang on for just a little longer though the Marines have some massive firepower.
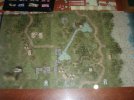
Turn 9:
The Japanese take the initiative but I don’t think they are in any mood to act first.
Sgt Stryker: this is Marine Three, come in Manley. Requesting fire support at Item six.
Manley fire control: Marine Three this is Manley targeting location Item six…….
Sgt Stryker: Manley round is on target, fire for effect, I say again fire for effect.
The Japanese hear the familiar sound of artillery incoming and try as best they can to hunker down. Col Ichio survives the pounding but men from both his squads are reduced further leaving just a few men defending the village.
Now the Marines move into the village though they take some small arms and sniper fire doing so. Some of the Marines are shaken as they try and advance from the determined Japanese fire. Train the Hero emerges from some of the shaken men in the north to try and lead them.
The Marines open up with their support MG’s trying to finish off the defenders though there is just too few of them now that its hard to pin point them for effective fire.
So the Marines are poised to take the village, the Japanese are on their last legs but are holding in there though holding out for another round just doesn’t seem too likely.
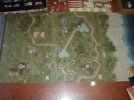
Turn 10:
The Japanese keep the initiative for the last round. The Marines rally everyone they can for the final push.
The Japanese sniper takes out a few Marines trying to get to grips with him. Sgt Stryker then directs some men with the M2 to target the enemy held up in some of the huts, the fire tears the huts to shreds along with all the enemy.
All hope seems lost now for the Japanese so Col Ichiro decides to launch a Banzai attack at Col Wisemans men since if they end up being locked in melee it will be hard for the Marines to occupy all the building by the end of the round.
BANZAI!!! A small group of Japanese emerge from their positions charging straight for the platoon of Marines. As they leave, fire from the Marine MG’s from the tree line erupts. The Japanese are unfazed and charge on, just as they are about to get to grips with the Marines one of the squads opens up and tosses a satchel charge in the path of the determined warriors, the rest of the Marines take cover and get ready to act once it explodes.
BOOOOOM! Col Wiseman and the other squad jump too and charge out through the smoke noticing all of the attackers mangled in front of their position (total of 19 on damage check for both!). They charge on ahead straight into the position the Japanese had just come from.
Now that all of the Japanese have been cleared from the village the rest of the Marines move in to see what they can find before returning back to the shore for their extraction, taking the victory.
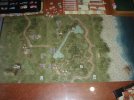
End of Game
Total losses for the Marines were overall equal to a platoon of men (4 half squads and a full squad), where the Japanese lost their entire force.
I played the Japanese very defensively allowing them to take some losses and then fall back to try and slow the Marines, maybe a little more aggression was needed in the jungles on board 29 as to try and buy some more time for the defence of the village. This is my first game of the HotP version and really learnt the Japanese just can't sit in moderate to light defensive positions as the Marine firepower is just overwhelming.
With the Marines I played pretty conservatively not taking too many risks, advancing setting up fire positions then advancing again, which dragged the game all the way to turn 10. A little risky I guess as a major setback would have really put them behind the 8 ball. Their artillery and air support was very effective softening up the Japanese squads. In the end the Marines can afford to take a few more risks and be a bit more aggressive as they have the numbers.
All in all a very enjoyable scenario and I can see this as being a good scenario to introduce people to the game with.
by Mark Selleck
So my first scenario with HotP so what better place to start than the first scenario in the book. This a pretty straight forward one with just infantry though some arty and air support though a good one to get back into the swing of things.
This one is about a raiding mission that the Marines conducted during the Guadalcanal campaign to collect Japanese supplies and intel.
So for victory the Marines need to have occupied all the building hexes on all maps before the end of turn 10, the Japanese need to hold them off to gain victory.
I set up the Japanese forward to engage the Marines from the start and try and delay them a bit, falling back and making new defensive positions along the way only after after absorbing some losses. Nothing too aggressive just trying to delay.
The Marines I have set up with a small group at the north and a larger group down south to try and advance either side of the water feature. Hopefully this will allow them to converge on the far village from both sides. Though I am a little worried about the northern group don't know if they are strong enough. Plan is to fire and advance, set up the heavy MG's inflict losses then pack up and move forward and do it again.

Turn 1:
The Marine raiding party land on the beach at Taivu without encountering any enemy as yet. Colonel Wiseman takes a force to try and move around the lower part of the lagoon while Lieutenant Leckie takes a platoon to head towards the top with the idea of closing on the far village from both sides.
The two Marine forces move off the beach into the jungle and almost immediately encounter small arms fire. The far left flank carrying the support MG starts to take casualties, completely unprepared for the engagement. The Japanese squad causing havoc on the US left expose themselves and start to take fire from Col Wisemans men assaulting up the beach, some of the Japanese fall cutting short the murderous fire they were laying down.
Lt Leckies men also take small arms fire and some mortar shells fired from behind the lagoon cause one of his squads to panic and find cover immediately.
The Japanese are encouraged by the surprise they were able to bring to the Marines and hope to keep them on the back foot.

Turn 2:
The Japanese take the initiative after a strong first encounter with the Marines. The Corpsman manages to get enough men back into action to be able to man the MG on the Marines left flank. On the far right Lt Leckie is going to have to try and get to his shaken men. The Marines now deploy all their support MG’s to give some pay back.
The Japanese decide to pull back their squad who had taken casualties a bit deeper inland to start setting up a new defensive line. Col Wiseman spots a Japanese squad wielding a light MG and has one of his Squad open up manning the M2 who pours devastating fire into the position eliminating all resistance from the position.
Col Ichiro seeing some of his men wiped out decides to take some of his weaker forces back towards the small village to force the Marines to make their way through the jungle.
Further North Lt Leckie links up with some of his shaken men in attempt to get them back into action while the support squad tries to locate where the mortar fire had originated from. They believe they see some movement and let their MG and small arm rip though it is ineffective and just causes the Japanese to lob some mortars their way that land harmlessly around them. Some Marines position themselves further forward while the Japanese open up with an MG on where the mortar attack when in but the rounds fly over head.
Meanwhile in the South some Marines notice some Japanese still occupy forward positions and target them but fail to dislodge them.
The Marines seemed to have recovered a little and the Japanese are falling back for a better defensive position.

Turn 3:
The Marines regain the initiative, Lt Leckie is able to rally his men while one of the MGs in the south is packed up and ready to move.
Lt Leckie: McKean this is Marine two, come in Mckean. Requesting fire support at Love five.
Mckean fire control: Marine two this is Mckean targeting location love five…….
Lt Leckie: McKean round is on target, fire for effect, I say again fire for effect.
The Japanese hear some loud thunder originating out at sea then the distinct sound of shells making their way toward the earth. The squads at the north of the lagoon relize they are the targets of the attack and are caught somewhat of guard. The shells rain down all around while the men seek cover, after the chaos clears the men re-emerge but notice some of their comrades lying lifeless, cut down by the fire.
Down in the south the Japanese keep falling back to the small village while the some of the Marines move forward trying to flush out anyone still positioned forward. Some small arm fire is taken but doesn’t slow them as they advance. The squad manning the M2 locate the Japanese fire and open up cutting down some of them in the process.
To the North the Marines try to locate the Japanese and lay some more fire on them from their MG’s but the Japanese appear to have gone to ground after the barrage and the incoming MG fire is ineffective. Thought after the Marine fire wears off the Japanese open up causing the squads positioned forward to shake.
The Marines decide to call in some of the big guns paying off somewhat in the north, though the Japanese are still blocking the path of advance and able to shake 2 of the squads. In the south the Marines have started their advance.

Turn 4:
The Japanese take the initiative encouraged by their successful counter attack. The Marines in the south pack up their support weapons to make ready for an advance.
The Japanese seeing a group of Marines breathing down their necks throw everything they have at them before they can get to grips with them. Some of the Marines don’t take well to the fire but some are not affected. So the Marines respond in kind with their blood up they completely wipe out the Japanese.
The Japanese now finishing occupying the first village, while Col Wisemans Marines make their way towards the defenders.
The Japanese to the north hold off wanting to see what the Marines will do, they know they should start falling back since they have taken casualties but the shaken Marines are just too tempting. Lt Leckie low crawls so as to help his men later on.
Col Wiseman notices some movement to his rear, his alarm quickly disappears as he notices it’s a fresh group on Marines under the command of Sgt Stryker coming up the beach. The South is not looking good for the Japanese, Col Ichiro is now reconsidering putting up a defence in the forward village.
The Japanese take a gamble in the North and try to pin point the Marines taking cover, excitement grips them as someone discovers some movement and the mortars open up as well as some small arms not long after. The Marines have been relentlessly pounded and now start to take casualties. The MG crew notice the mortars popping up and target them though the Japanese completely ignore the incoming fire.
The south is looking overwhelming in strength though the Japanese are causing lots of problems in the north for Lt Leckie.

Turn 5:
The Japanese hold the initiative for now. Col Wiseman and Lt Leckie rally most of their men though a few are still in bad shape.
The Japanese with the mortar try their luck again and are able to locate the shaken Marines again and are relentless, throwing everything they have at them. Lt Leckie is forced to hit the deck while one of his squads is completely wiped out. The Marines respond with the MG near by cutting down some of the Japanese. The other Japanese squad decides its time to start falling back to the village now, while the BAR wielding men try to get some pay back for their fallen, with little effect.
Col Wiseman and his men assault up the trail towards the small village in the south with the rest of the force behind them. The Japanese sit by waiting to see if there is a good time to pounce, though those assaulting Marines make things tricky.
Some of the Japanese make their way back to the village, as dose Col Ichiro and his men after contemplating launching a Banzai which would not have achieved much at this point in time.
So half way through, the Japanese are starting to melt away to put up their last line of defence, though they have caused all sorts of issue in the north.

Turn 6:
The Marines have them on the run and take the initiative with everyone rallied and ready to go.
Down in the south the Marines advance up into the village since the Japanese have abandoned it. Sgt Stryker moves off to lead some Marines up to the river to try and create a fire position on the other side. Col Wisemans men take some MG fire from the village but the Japanese haven’t seemed to have sighted the MG properly yet.
Up north the Japanese armed with the mortar haven’t lost sight of the Marines and continue their fire, though this time Lt Leckie’s leadership pays off. The Marines then return fire finally silencing the mortars.
So the Marines have now captured everything of interest from the first village. The Japanese have now just about set up their new defensive position and Lt Leckie’s Marines have finally freed up the Norther approach.

Turn 7:
The Japanese feeling more secure in their new position take the initiative and the Marines in the north dismantle their weapons to ready for the advance.
The Japanese stragglers make their way into their defensive positions as Lt Leckie and his men start advancing. The Marines wade through the river and are forced to hit the ground as they emerge from the other side due to the heavy fire from the Japanese Type 92. Col Wiseman directs his men to fire on the MG position but fails to silence it.
More of the Marines now move out of the village, CRACK! CRACK! A yell goes up SNIPER FRONT! A sniper emerges on the hill shaking a few Marines.
The Wildcat that was circling above spots some targets and comes in for a run the Japanese manning the MG noticed the wildcat going into a dive and take cover only suffering light casualties, though the rest of the squads in the village and jungle fail to notice until too late. A squad is completely cut down and another takes heavy casualties while Col Ichiro is wounded in the attack.
The rest of the Marines now move to take up firing positions.
Now the Marines are in better positions and the Japanese were severely weakened by the Wildcat, though the Marines still have some work to do.

Turn 8:
The Marines regain the initiative, rally most of their men and deploy weapons ready to pour some lead.
Sgt Stryker realizing the threat of the Japanese heavy MG directs some heavy fire from his platoon and M2 into the building cutting down all the occupants. Immediately Col Ichrio orders some men to re-man the weapon, who take some fire from another MG but just manage to come through unharmed.
Col Ichrio repositions himself at the northern part of the village just as the Lt Leckie and his men move up to flank the village. Col Wiseman gets his men to pour it on the manned MG with another group of Marines once again putting the MG out of action.
The Japanese sniper now fires at a group of Marines revealing their position from all their muzzle flashes inflicting some casualties. The Japanese at the north of the village also return fire at the Marines but fail to add to the carnage.
The Japanese are in a bit of trouble now, they need to try and hang on for just a little longer though the Marines have some massive firepower.

Turn 9:
The Japanese take the initiative but I don’t think they are in any mood to act first.
Sgt Stryker: this is Marine Three, come in Manley. Requesting fire support at Item six.
Manley fire control: Marine Three this is Manley targeting location Item six…….
Sgt Stryker: Manley round is on target, fire for effect, I say again fire for effect.
The Japanese hear the familiar sound of artillery incoming and try as best they can to hunker down. Col Ichio survives the pounding but men from both his squads are reduced further leaving just a few men defending the village.
Now the Marines move into the village though they take some small arms and sniper fire doing so. Some of the Marines are shaken as they try and advance from the determined Japanese fire. Train the Hero emerges from some of the shaken men in the north to try and lead them.
The Marines open up with their support MG’s trying to finish off the defenders though there is just too few of them now that its hard to pin point them for effective fire.
So the Marines are poised to take the village, the Japanese are on their last legs but are holding in there though holding out for another round just doesn’t seem too likely.

Turn 10:
The Japanese keep the initiative for the last round. The Marines rally everyone they can for the final push.
The Japanese sniper takes out a few Marines trying to get to grips with him. Sgt Stryker then directs some men with the M2 to target the enemy held up in some of the huts, the fire tears the huts to shreds along with all the enemy.
All hope seems lost now for the Japanese so Col Ichiro decides to launch a Banzai attack at Col Wisemans men since if they end up being locked in melee it will be hard for the Marines to occupy all the building by the end of the round.
BANZAI!!! A small group of Japanese emerge from their positions charging straight for the platoon of Marines. As they leave, fire from the Marine MG’s from the tree line erupts. The Japanese are unfazed and charge on, just as they are about to get to grips with the Marines one of the squads opens up and tosses a satchel charge in the path of the determined warriors, the rest of the Marines take cover and get ready to act once it explodes.
BOOOOOM! Col Wiseman and the other squad jump too and charge out through the smoke noticing all of the attackers mangled in front of their position (total of 19 on damage check for both!). They charge on ahead straight into the position the Japanese had just come from.
Now that all of the Japanese have been cleared from the village the rest of the Marines move in to see what they can find before returning back to the shore for their extraction, taking the victory.

End of Game
Total losses for the Marines were overall equal to a platoon of men (4 half squads and a full squad), where the Japanese lost their entire force.
I played the Japanese very defensively allowing them to take some losses and then fall back to try and slow the Marines, maybe a little more aggression was needed in the jungles on board 29 as to try and buy some more time for the defence of the village. This is my first game of the HotP version and really learnt the Japanese just can't sit in moderate to light defensive positions as the Marine firepower is just overwhelming.
With the Marines I played pretty conservatively not taking too many risks, advancing setting up fire positions then advancing again, which dragged the game all the way to turn 10. A little risky I guess as a major setback would have really put them behind the 8 ball. Their artillery and air support was very effective softening up the Japanese squads. In the end the Marines can afford to take a few more risks and be a bit more aggressive as they have the numbers.
All in all a very enjoyable scenario and I can see this as being a good scenario to introduce people to the game with.