Welcome to the LnLP Forums and Resource Area

We have updated our forums to the latest version. If you had an account you should be able to log in and use it as before. If not please create an account and we look forward to having you as a member.

Fire Team - Red Eclipse AAR - The Encounter 2

Steve Overton

Member
Joined
Jan 15, 2015
Messages
368
Points
28
Location
Odessa, Texas
Impulse 3 Order 2 is a Tactical Movement Order by Makarov in L4.

To do a Tactical Movement those that move do so with their Movement Point Allowance halved. (losing all fractions) And if they fire they lose 2 Infantry Firepower points or add +2 to any 'To Hit' attempt. Whether or not that particular unit moves doesn't matter. The Tactical Movement penalties apply to all units using the order.

In this case Makarov, in L4, would have 3 Movement Points, the Crew would have 1 Movement Point, the Regular Fire Team would have 2 Movement Points and the Green Fire Team would have 2 Movement Points available to move. For any unit that moves it's entire movement with a leader there is a 1 Movement Point bonus. That would give both Fire Teams an additional Movement Point and have 3 available to them. The Crew would only gain to where it has 2.

The Fire Teams in location M4 would both have 2 Movement Points available to them.

Each stack of units moving does so individually for purposes of determining Opportunity Fire.

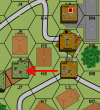
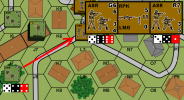
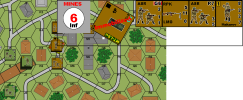
The Fire Teams in location M4 move first. They move into L5 (1) and then L6 (1). The US Fire Team in J6 can see them in L6 and they are at range 2. This can trigger an Opportunity Fire if the US Player wishes to. The dilemma is that they can only fire Opportunity Fire once per impulse. Makarov has already activated for Tactical Movement. He and the two Fire Teams have a movement of up to 3 Movement Points.

Where is he going???? He can't fire so he has to move. Where will he move???


Im3 Order 2f.png


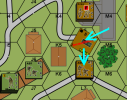
Does the US Fire Team Opportunity Fire on those in the open now or wait? They have to declare their intention now before any other movement takes place.
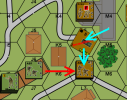


Im3 Order 2f1.png


They decide to hold their fire in hopes of getting a shot at Makarov.
 

Steve Overton

Member
Joined
Jan 15, 2015
Messages
368
Points
28
Location
Odessa, Texas
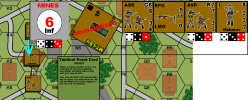
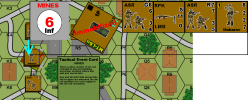
Markarov now moves into location L5 and the US Player plays a Tactical Event Card. He plays his 'Mines' card. This card could have been played when the two Fire Teams moved through there on their way to L6 but that would have alerted Makarov they were there and he would have probably chosen a different route.


Im3 Order 2g1.png
 

Steve Overton

Member
Joined
Jan 15, 2015
Messages
368
Points
28
Location
Odessa, Texas
So, now we see how the vehicle got immobilized in the first place.

MINES!!

With no time for reconnaissance or consulting with the vehicle crew Makarov has made a poor tactical choice by being too aggressive. When the smoke clears from the explosion he will learn the extent of his mistake.


Im3 Order 2g2.png


The mine attack is a 6 RED. The infantry is moving in the open. If the vehicle hadn't been in the location the infantry would have been moving on the road but because the vehicle is there and is taking up the road the infantry had to go around. They actually gain by being in open ground rather than walking on the road. The mine attack is 6 + 12 (5 + 4 + 3) = 18. TAV = 18.

Marakov's morale/experience is 8, the die roll is an 8. 8 + 8 = 16. TDV = 16.
TAV is larger. Makarov breaks and ends his movement in the location.

The Regular Fire Team's morale/experience is 7, the die roll is a 7. 7 + 7 = 14. TDV = 14.
TAV is larger. The Regular Fire Team breaks and ends it's movement in the location.

The Green Fire Team's morale/experience is 6, the die roll is an 8. 6 + 8 = 14. TDV = 14.
TAV is larger. The Green Fire Team breaks and ends it's movement in the location.


Im3 Order 2h.png
 
Last edited:

Steve Overton

Member
Joined
Jan 15, 2015
Messages
368
Points
28
Location
Odessa, Texas
The movement part of the Tactical Movement Order is now complete and those with an LOS to an enemy unit may now fire.

Note that Movement/Firing can be done in any order the player chooses. In this case I chose to move everyone first.

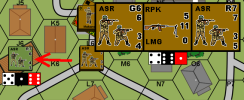
The Soviet units in location L6 will now fire at the US Fire Team in location J6. Each unit firing for the Soviets has a -2 Die Roll Modifier (DRM) for firing while moving.

Im3 Order 2J1.png
 

Steve Overton

Member
Joined
Jan 15, 2015
Messages
368
Points
28
Location
Odessa, Texas
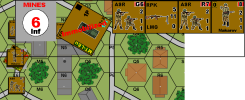
The Regular Fire Team has an Infantry Firepower of 7 BLACK. The RPK has an Infantry Firepower of 5 BLACK. The Green FIre Team has an Infantry Firepower of 6 Black. Each of them lose -2 for firing during a Tactical Movement order. The die roll is a 10.

7 - 2 + 5 - 2 + 6 - 2 + 10 = 22. TAV = 22.

The US Fire Team has a morale/experience of 7, the wooden building adds +2 for cover, the die roll is a 6. 7 + 2 + 6 = 15. TDV = 15.
The TAV is larger so the US Fire Team broke.

Im3 Order 2J4.png
 

Steve Overton

Member
Joined
Jan 15, 2015
Messages
368
Points
28
Location
Odessa, Texas
The final results of the Tactical Movement order are Makarov and two Fire Teams broken in L5 and the US Fire Team broken in J6.


Im3 Order 2 Z Final.png


This ends the 3rd Impulse. It also was the last Soviet Command Point chit in the draw pile. The Soviets have 2 and the US Player has 3. We know at this point that the US Player will get the next 2 impulses.
 
Last edited:

Steve Overton

Member
Joined
Jan 15, 2015
Messages
368
Points
28
Location
Odessa, Texas
The Advance Order allows for units to advance a single location and not trigger Opportunity Fire by the defenders.

The Regular Fire Team in H6 advances to J5.
The Group with Albanese in I6 advances to J6.
The Green Fire Team in H7 advances to J7.


Im4 Order 1c.png


The broken Fire Team in J6 doesn't move.

There is a 'normal' stacking limit in the KN series. What that means is it's up to you as to how many people you jam into a 50 meter diameter area. In real life you can get a lot of people in there if they are standing next to each other. BUT (there's always a but isn't there), if you put more than 10 graphic representations in a location they start to give a +1 DRM for EACH graphic representation you have over 10. Singleman counters are 1 graphic representation, Fire Teams and Crews are 2 graphic representations and a squad is 3 graphic representations. That would allow 3 Squads and a Leader to be in the same location with no penalty for the number of people in the location.

Since the invention of the machinegun the tactical deployment of infantry units on the battlefield has been to spread them further and further apart. The closer together they are the more of them can get hit from a single machinegun. Artillery casualties are also multiplied by compact infantry formations. To combat these excessive casualties the infantry has spread out. So much so that the term 'empty battlefield' is used to describe the use of fire teams in combat. What can be seen can be hit. If it can be hit it can be killed. This applies to everything on the battlefield.

So, after our advance into location J6 this is the situation in that location.


Im4 Order 1d.png


Impulse 4 is now finished because neither player wants to play a Tactical Event Card.
 

Steve Overton

Member
Joined
Jan 15, 2015
Messages
368
Points
28
Location
Odessa, Texas
Turn 1, Impulse 5 is a US Command Point 2 chit.


Tn1 Im5.png


This is the last impulse of the turn as all of the Command Point chits have now been drawn.
 

Steve Overton

Member
Joined
Jan 15, 2015
Messages
368
Points
28
Location
Odessa, Texas
The first order for Impulse 5 is to attempt to Rally the broken Fire Team in J6. The Fire Team has a morale/experience level of 7. The Leader adds his Leadership Bonus of 1. The Fire Team is in a wooden building which adds it's cover value of +2.


Im5 Order 1a.png


7 + 1 + 2 = 10. The Fire Team will rally on a 9 or less. If the rally die roll matches the rally number exactly, in this case a 10, it would disrupt the broken unit.

The die roll is a 7. The Fire Team rallies.


Im5 Order 1a MC.png


There are three states of morale in Kontact Now.

  • Good - which is the normal state. There are no negative modifiers in this state.
  • Disrupted - which is a state that has some firepower and movement restrictions.
  • Broken - which is a state that has some firepower and movement restrictions.

It is possible to have both a Disrupted and Broken morale state at the same time.
When rallying a Disrupted state is removed first if both are present.

2 Disrupted become a Broken result.
2 Broken the unit is removed from play.
 
Last edited:

Steve Overton

Member
Joined
Jan 15, 2015
Messages
368
Points
28
Location
Odessa, Texas
Order 2 is for the Fire Team in location I7 to make an attack on the Soviet Fire Teams in L6. They are in open ground if they can be broken that would help the US situation greatly.

The US Fireteam has an Infantry Firepower of 5 BLACK at a range of 3. The Soviets are in range so they fire. The die roll is a 9.
5 + 9 = 14. TAV = 14. (TAV = Total Attack Value)

The Soviet Regular Fire Team has a morale/experience of 7. There is no cover for the L6 location. The units are not on the road as they are not moving at this time and would be off to the side of the road. Nobody stands in the middle of the road in a combat zone and lives long. The die roll is an 8.
7 + 8 = 15. TDV = 15. (TDV = Total Defensive Value)
Because the TDV is larger the Fire Team is not broken.

The Soviet Green Fire Team has a morale/experience level of 6. There is no cover for the L6 location. The die roll is an 11.
6 + 11 = 17. TDV = 17.
Because the TDV is larger the Fire Team is not broken.


Im5 Order 2F1.png
 

Steve Overton

Member
Joined
Jan 15, 2015
Messages
368
Points
28
Location
Odessa, Texas
If either player wishes to play a Tactical Event Card at this time they may. Since neither does the Action Phase is finished.

The Administrative Phase consists of:

  • Check Smoke/Drift Chart and move in the appropriate direction or remove as directed by the chart.
  • Discard Tactical Event Cards within organization limits.
  • Move the turn counter one space on the Turn Track or roll for Sudden Death if applicable.

There is no smoke so we are good with that.
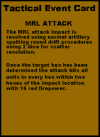
The Soviet Player wishes to discard the MRL ATTACK card. Which he does at this time.


! MRL Discard.png


Move the counter on the Turn Track to space number 6 and Turn 1 is finished because we don't roll for Sudden Death until the game reaches space 7 on the Turn Track.


! Move Turn to 6 Space.png
 

Steve Overton

Member
Joined
Jan 15, 2015
Messages
368
Points
28
Location
Odessa, Texas
What just happened here?

The Americans moved first and got themselves into long rowhouse from J6 to G7. They had one Fire Team that didn't quite make into cover.

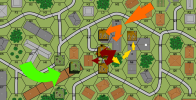
Then the Soviets moved up into the building a L4/M4. Pulled their Crew back from the immobilized MTLB. The Soviet Leader then decided to rush across the street and get troops in the K5 building to keep the Americans back from the disabled vehicle. He didn't take time to consult with the crew of the vehicle and had little idea of the tactical situation. All he knew was that he needed to put some distance between where he expected any threat to come from and where that vehicle was sitting exposed out in the street.

The Soviet infantry from M4 moved first and there took no fire. All was quiet. It seems the Americans didn't see them moving. The Soviet infantry didn't fire either.

When they went out into the street one of Marakov's men stepped on a mine. The rest of them went to ground right in front of the buildings they had just left. When the mine went off the Soviet infantry out in the open fired on the US infantry in J6 and they broke.

The US then lowcrawled their infantry forward and a single Fire Team moved out of the building to some woods a short distance away. They took the 2 Soviet Fire Teams in L6 under fire but they didn't hit anything. At 150 meters with people laying on the ground it's not the easiest thing to do to hit someone. Especially if they are shooting back.

Both sides are trying to regroup. The both leaders are already on their radios calling for more support. In the initial encounter neither side took losses. The Soviets are struggling to control their forces with their leader broken and in an open ground location.

It will be interesting to see what these two leaders do next.


! Turn 1 Summary 3.png
 
Last edited:

Steve Overton

Member
Joined
Jan 15, 2015
Messages
368
Points
28
Location
Odessa, Texas
We determine the Command Points in the same manner as we did before the game started. At the beginning of each turn the situation of your Leaders on the map combined with the default orders are figured.

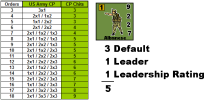
In this case the US Command Point chits will stay the same. Their leadership situation hasn't changed from the beginning of the game.


Turn 2 CP Chart US.png
 

Steve Overton

Member
Joined
Jan 15, 2015
Messages
368
Points
28
Location
Odessa, Texas
The Soviets on the other hand have their on map situation changed.


Turn 2 Soviet At Start Positions.png


The Soviet Leader being broken loses his Leadership Bonus. It goes to zero. Which is what gets added.


Turn 2 CP Chart Sov.png

The new Soviet Command Point chits are 1 one and 1 two Command Point chits. They have the same number of Command Point chits in the draw but they lost an order. Because the Soviet command system is more structured than the US system they give a larger group of orders at a time that the US Army. This shows up in larger numbers on their Command Point chits to be drawn versus the US ones.
 

Steve Overton

Member
Joined
Jan 15, 2015
Messages
368
Points
28
Location
Odessa, Texas
We are placed the Command Point chits in the draw cup and the Action Phase is ready to start.

Turn 2 Impuse 1 is a Soviet Command Point 1 chit.

Tn2 Im1.png

That's good because the US Player got 2 CP chits in a row to end Turn 1. This will give the Soviet Player a chance to recover a bit.
 

Steve Overton

Member
Joined
Jan 15, 2015
Messages
368
Points
28
Location
Odessa, Texas
The Soviet Player orders the units in L5 to rally. Makarov attempts to rally first. His morale/experience is an 8. The die roll is a 7.


Im1 Order 1a.png


He rallies.


Im1 Order 1b.png

He then adds his Leadership Bonus to the other units in the same location he's in.

The Regular Fire Team has a morale/experience level of 7, plus +1 for Makarov's Leadership Bonus makes it a 9. The die roll is a 5. He passes.

The Green Fire Team has a morale/experience level of 6, plus +1 for Makarov's Leaderhip Bonus makes it a 7. The die roll is a 9. He doesn't pass and stays broken.

Im1 Order 1d.png
 

Cottonbaler

Member
Joined
Sep 14, 2013
Messages
89
Points
8
Location
Sterling, VA USA
Very interesting system. Will this be a board game or a Vassal/computer game, or both? I presume the graphics for this AAR are working representations and not the final art.
 
Top